
Easter can be a very fun and exciting time for children, with an extra long weekend, hot cross buns and chocolate galore, what’s not to love? If your children get bored over the long weekend, we have compiled a list of Easter themed arts and crafts ideas for children to keep them busy.
These Easter arts and crafts use simple supplies that you can find in your house or at a local craft store. But the great thing is that with a little bit of creativity and imagination, your children can take these arts and crafts to a whole new level for hours of fun.
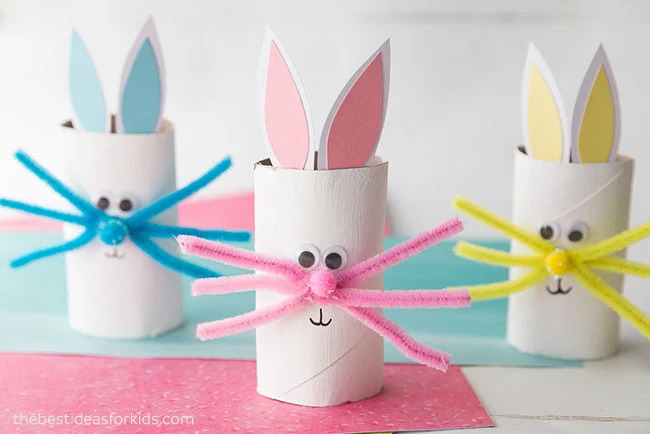
1. Toilet Roll Bunnies
Difficulty: Easy
Some adult supervision required.
Empty toilet paper rolls can be a great source of creativity for any kid. In this activity children turn empty toilet paper rolls into bunnies. All that’s required is empty toilet paper rolls and a creative imagination!
Step 1: Paint toilet rolls white using acrylic paint and leave to dry.
Step 2: Trace two bunny ears on white cardboard and then make smaller ear inserts with coloured paper of your choice.
Step 3: Glue two googly eyes on the toilet paper roll.
Step 4: Twist three pipe cleaners in the middle and glue them directly under the googly eyes.
Step 5: Glue a small pom pom on top of the pipe cleaners for a nose.
Step 6: Glue bunny ears to the inside of the top of the toilet paper roll, directly above the bunny face.
Step 7: Use a permanent marker to draw on a mouth underneath the pipe cleaners.
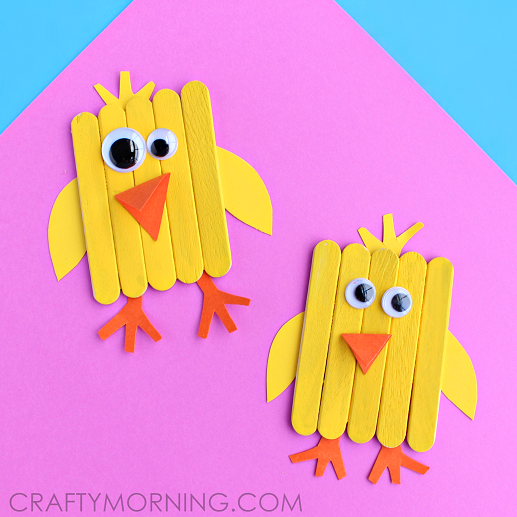
2. Popstick Chicks
Difficulty: Easy
Some adult supervision required.
This simple craft turns ordinary popsticks into baby chicks that can be hung as ornaments or given as presents. Using the cardboard on the back, you can even write a short message to someone if you are sending it as a present.
Step 1: Glue five mini popsticks onto a piece of cardboard.
Step 2: Paint popsticks yellow using acrylic paint.
Step 3: Cut wings out of yellow paper.
Step 4: Cut feet and beak out of orange paper.
Step 5: Glue googly eyes and beak to the front of the popsticks.
Step 6: Glue top of wings and feet to the back of the popsticks.
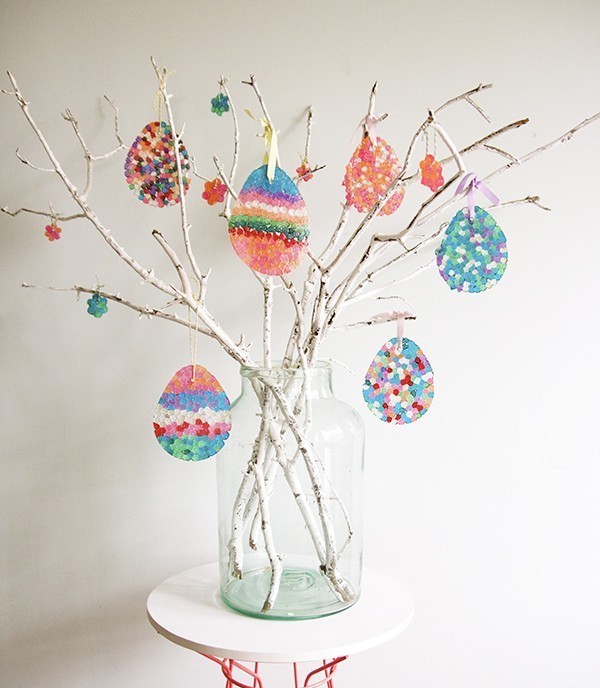
3. Easter Tree
Difficulty: Easy
Some adult supervision required.
This is a simple activity to give you an excuse to get out of the house for an afternoon, whether it’s in your own backyard or going to visit the local park. The best part of the Easter tree is that you can make more ornaments!
Step 1: Collect 7-10 fallen tree branches about 30-50cm in length.
Step 2: Put them into an empty vase
Step 3: Decorate with Easter-themed ornaments.
Tip: Think of different themes for decorations and make ornaments around that theme.
4. DIY Easter Bunny Bean Bag Toss

Difficulty: Hard
Help from an adult required.
Create your own bean bag toss game for endless hours of fun! This game can be easily created into a competition for the whole family to enjoy. For an extra challenge, you can set up a points system (i.e. 10 points for the mouth, 5 points for the tummy), create a leaderboard and keep track of high scores.
Step 1: Sketch a bunny on a large piece of cardboard.
Step 2: Cut out the mouth and tummy holes.
Step 3: Paint design using black paint over sketch.
Step 4: Sketch 12 identical triangles onto orange felt, ensuring they are small enough to fit through the holes in the cardboard.
Step 5: Sketch 6 leafy bits onto green felt.
Step 6: Cut out sketches on orange and green felt.
Step 7: Using a hot glue gun, glue the green felt leafy bits onto the short side of the orange felt triangles. Glue the remaining orange felt triangles together, leaving the top portion of the carrot open.
Step 8: Use a funnel to fill the carrot with either dried beans, popcorn kernels or rice and glue the open portion shut, so the carrot is completely sealed.
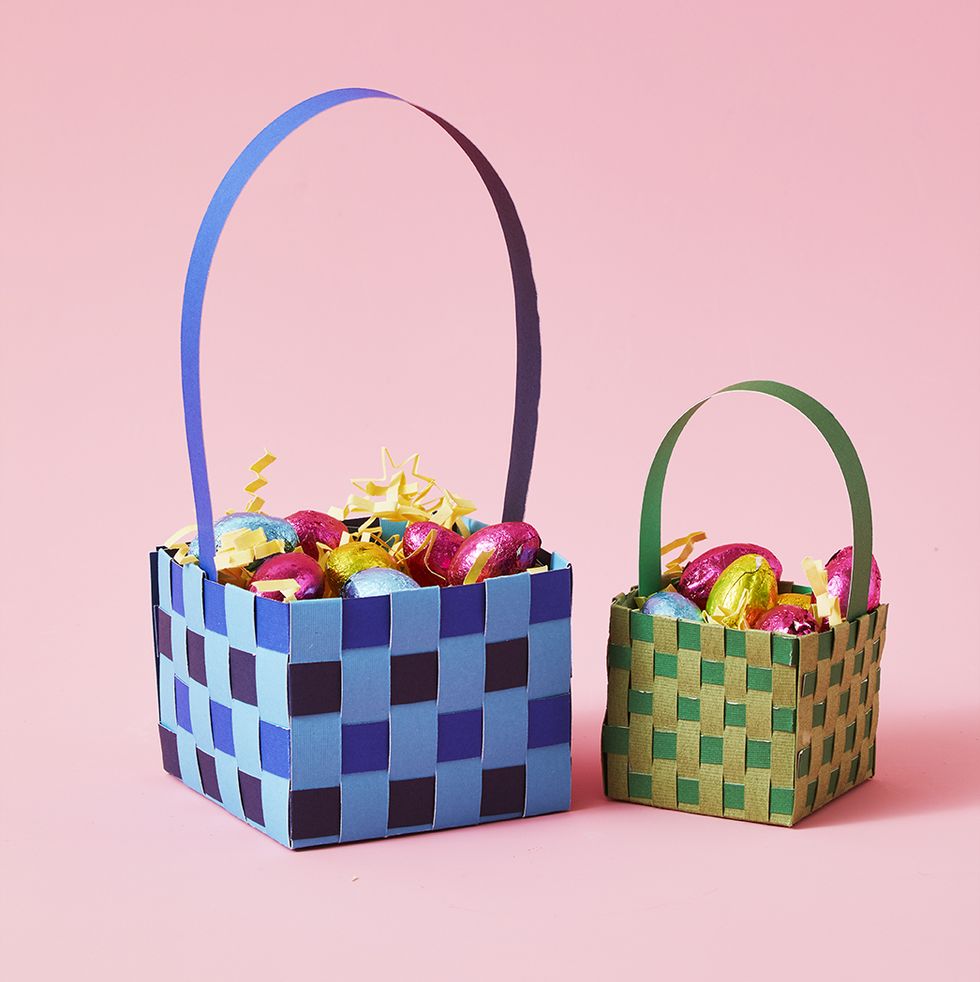
5. Paper Easter Basket
Difficulty: Hard
Some adult supervision required.
DIY your own easter baskets using coloured paper. The perfect basket to compliment any easter egg hunt. This Easter basket craft activity teaches children how to not only follow coloured patterns, but uses their hand-eye coordination skills through the weaving of the basket.
Step 1: Cut 2.5cm wide stips of paper. You will need four 45cm strips and eight 35cm strips of paper (four in your primary colour and four in your secondary colour). Set aside one 45cm long strip for the handle.
Tip: If you don’t have paper long enough, stick two pieces of paper together.
Step 2: Arrange the 35cm strips four across, alternating between the primary and secondary colour.
Step 3: Weave the remaining 35cm strips through the strips that have already been placed down, alternating colours again.
Step 4: Adjust the strips to make a perfect square.
Step 5: Glue down the overlapping outside edges to secure.
Step 6: Fold the sides inwards towards the centre to create walls.
Step 7: On the three 45cm long strips of paper, mark every 10cm with a fold.
Step 8: Glue the ends of the 45cm strips together to create a square.
Step 9: Weave the squares through the ends of the basket to create walls.
Step 10: Fold over excess paper and glue to the inside.
Step 11: Glue the end of the handle to the inside of the basket.
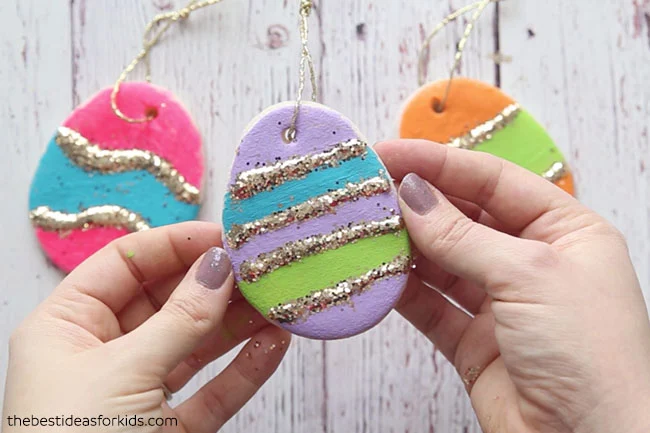
6. Salt Dough Easter Egg Ornaments
Difficulty: Intermediate
Help from an adult required
Salt dough is such an easy way for kids to be creative and decorative. Use these colourful ornaments on an Easter Tree indoors or hang them in the backyard. And the fun doesn’t stop there, salt dough can be moulded into any shape so there is plenty of opportunity to create something unique and exciting for any time of the year.
Step 1: Combine 4 cups for regular flour, 1 cup of salt and 1 ½ cups of warm water and mix well until a dough forms.
Step 2: Take dough out of the bowl and knead for 10 minutes.
Step 3: Roll the dough out so it is roughly 5mm thick and use cookie cutters to cut them into egg shaped pieces.
Step 4: Use a straw to make a hole in the top of the ornament.
Step 5: Let the ornament air dry for a day.
Step 6: Once the ornament is dry, decorate with acrylic paint and glitter.
Step 7: When finished decorating the ornament, seal with mod podge or a clear glaze spray.
Step 8: Thread string or ribbon through the hole and tie in a long loop.
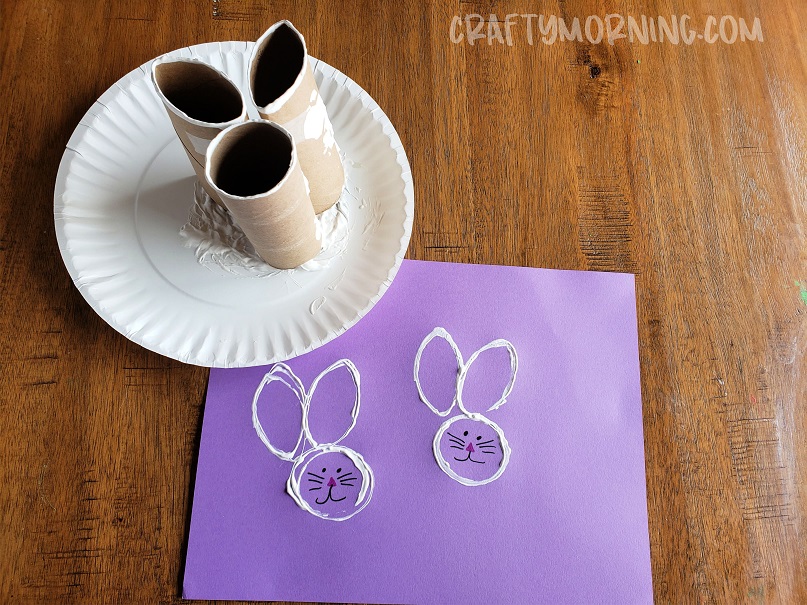
7. Toilet Roll Bunny Stamps
Difficulty: Easy
No supervision required.
This fun art activity lets kids make their own stamps from empty toilet paper rolls and add a bit of their own creativity too. Toilet paper rolls can allow kids to be so creative with limitless possibilities. This Easter craft can easily be turned into an art project with children drawing the rest of the bunny’s body and the scenery around it.
Step 1: Flatten two toilet paper rolls to create the shape of ears for the bunny.
Step 2: Tape them together with a round toilet paper roll in the shape of a bunny’s head, ensuring that the toilet rolls are level with each other.
Step 3: Pour white paint on a paper plate.
Step 4: Using the toilet roll stamp, dip the bottom into the white paint and stamp onto coloured paper.
Step 5: Use a marker to draw a face on the bunny.
Tip: Get children to paint a scene around the bunnies.
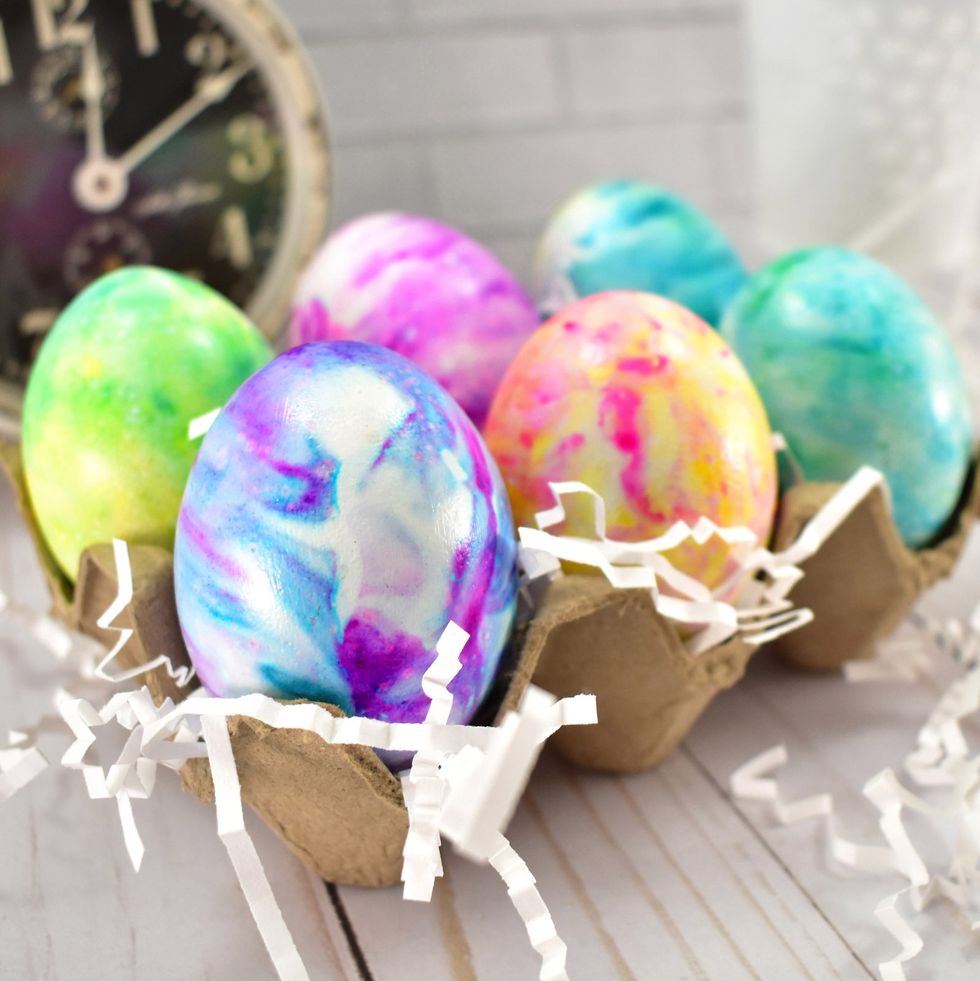
8. Shaving Cream Easter Eggs
Difficulty: Intermediate
Help from an adult required.
Create colourful marble patterned eggs with shaving cream. Colourful hard-boiled eggs are a staple for any Easter celebration and this activity will create the funkiest hard-boiled eggs with an unlimited number of potential designs.
Step 1: Put eggs in a pot and fill with water so there is about 5 cm of water over the eggs.
Step 2: Put pot on stove and heat up until water reaches boiling point.
Step 3: Remove pot and cover with lid for 12 minutes.
Step 4: Remove eggs from pot with spoon or tongs and leave to rest for two minutes.
Step 5: Place eggs in a bowl of vinegar for 20 minutes then carefully rinse.
Step 6: Use a muffin tray and fill each hole approximately ⅔ with shaving cream.
Step 7: Add drops of food coloring to each muffin tray whole, using approximately 2-3 colours for each one.
Step 8: Use a skewer or toothpick to swirl the food colouring through the shaving cream.
Step 9: Gently place the egg on top of the shaving cream and fold over to cover it. Leave for 30 minutes.
Step 10: Rinse eggs under water and dry with a paper towel.
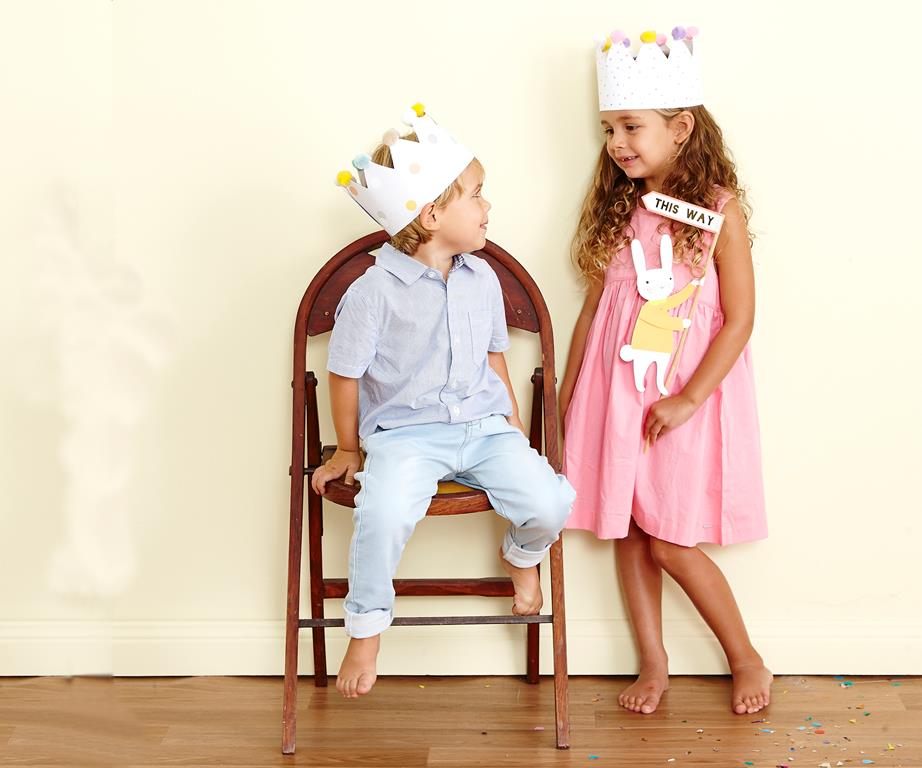
9. Easter Paper Hats
Difficulty: Easy
Some adult supervision required.
DIY creative crowns with cardboard and pom poms so any kid will feel like a king or queen this Easter. Even though this is an easy Easter craft, it can be a great opportunity for kids to personalise their crown in their own style.
Step 1: Cut a strip of cardboard around 15cm wide and around 40cm long.
Step 2: Draw triangles at the top of your crown with a pencil.
Step 3: Stick decorative paper onto the cardboard and cut out the triangles to make the crown shape.
Step 4: Measure crown around the child’s head for the perfect fit and staple to secure.
Step 5: Glue small pom poms onto the tips of the crown.
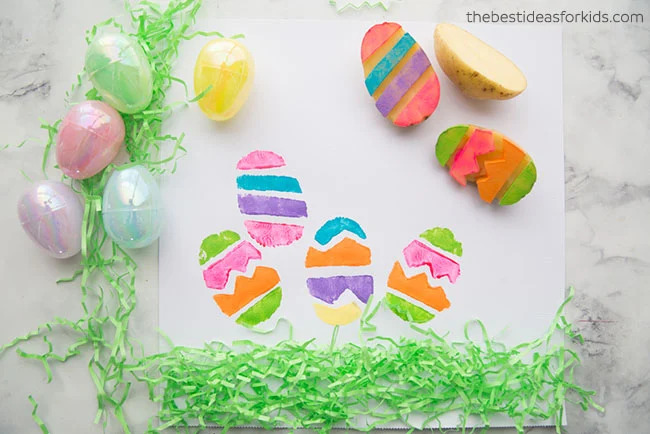
10. Potato Stamp Easter Eggs
Difficulty: Easy
Help from an adult required.
Make an abundance of colourful eggs using potato stamps. There is so much fun to be had from this simple activity. Write messages on the back and give to family and friends or glue the designs back to back and thread string or ribbon through it to create an ornament.
Step 1: Cut a potato in half and carve designs into either side.
Step 2: Use acrylic paint to paint each section of the potato.
Step 3: Stamp onto white paper.
Step 4: Decorate with glitter and cut out.
Step 5: Rinse potato repeat steps 2-4.
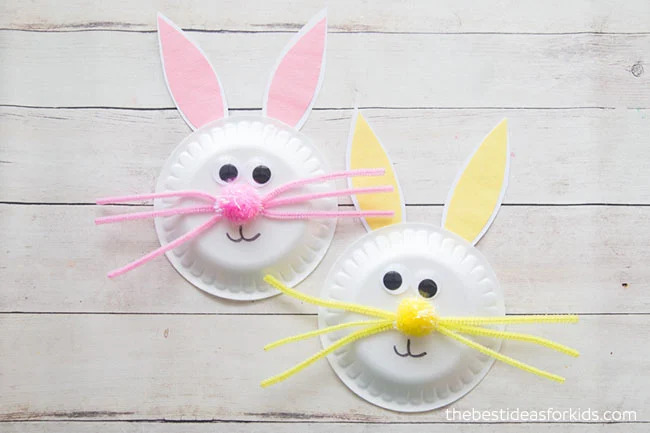
11. Paper Plate Easter Bunnies
Difficulty: Easy
Some adult supervision required.
This easy Easter craft uses paper plates to make your own easter bunny face. This is a super simple craft that kids of any age will enjoy. To take it to the next level, get your child to draw a bunny body on a piece of paper and glue the paper plate head on top.
Step 1: Take three pipe cleaners and twist them together in the centre.
Step 2: Glue the pipe cleaners to the bottom of the paper plate.
Step 3: Glue a pom pom on top of the pipe cleaners.
Step 4: Cut out bunny ears from white cardboard and smaller ear inserts from pink cardboard.
Step 5: Glue ear insert onto the white cardboard and then glue on to the top of the paper plate.
Step 6: Glue two googly eyes above the pipe cleaners and pom pom.
Step 7: Use a marker to draw a mouth.
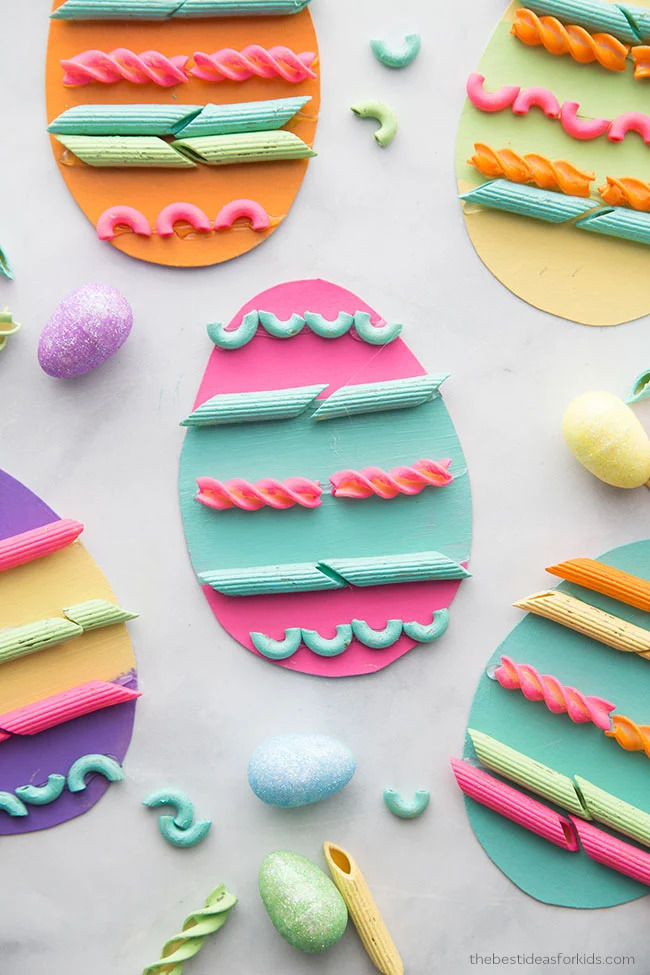
12. Pasta Easter Eggs
Difficulty: Intermediate
Some adult supervision required.
Create your own easter egg ornaments with pasta. Use multiple types of small pasta to create a variety in colour and texture. Pasta art is a great opportunity for children to make patterns and designs with a number of different shapes and sizes.
Step 1: Fill a small snap lock bag with a variety of pasta. Add paint and coat the pasta. Repeat with each colour.
Step 2: Allow pasta to dry on wax paper.
Step 3: Cut out Easter egg shapes from cardboard.
Step 4: Paint cardboard in block patterns or solid colours.
Step 5: Glue pasta onto cardboard.
Step 6: Punch a hole in the top of the ornament and thread string or ribbon through and tie a long loop.
13. Easter Carrot Card
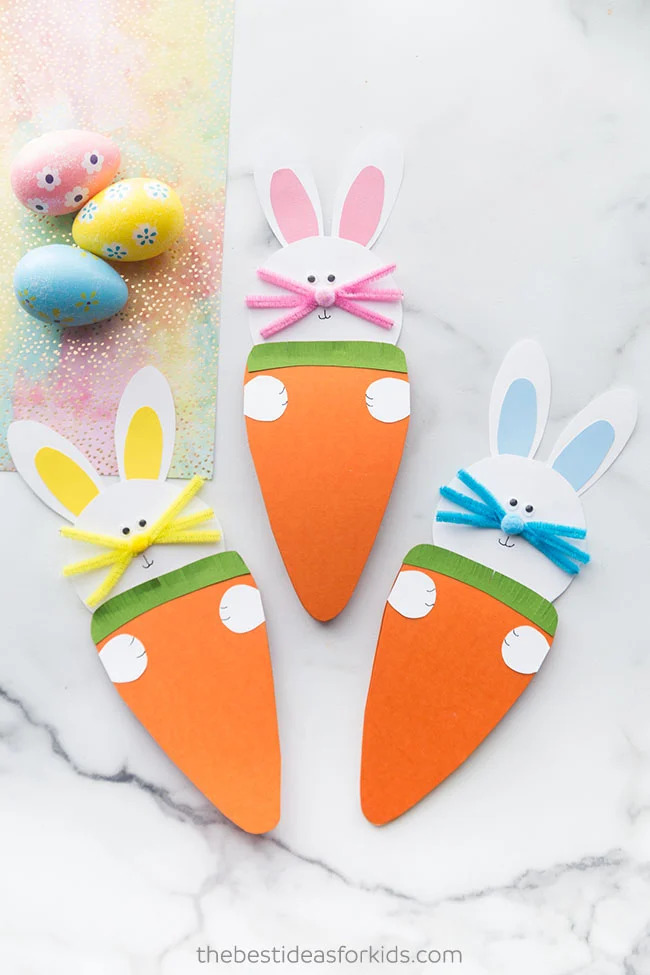
Difficulty: Intermediate
Some adult supervision required.
It has been a challenging 12 months and many families were not able to see each other last easter. If you are unable to see your family and friends this Easter, this is the perfect Easter card to send family and friends to wish them a happy easter.
Step 1: Fold a piece of orange cardboard in half and cut a rounded triangle with the shortest side on the fold. Be careful to not cut the fold off.
Step 2: Trace the top of the carrot (along the fold) onto green cardboard.
Step 3: Cut out the traced section of the green cardboard and a white circle the same width as the carrot.
Step 4: Glue the green cardboard to the front of the carrot, and glue the white cardboard to the back of the carrot, ensuring that the majority of it can be seen from the front.
Step 5: Cut out two ears from white cardboard and two inner ear inserts from coloured cardboard.
Step 6: Glue the inner ear inserts onto the white ear cardboard and then glue to the top of the white circle on top of the car.
Step 7: Glue two small googly eyes to the centre of the white circle.
Step 8: Twist three small pipe cleaners around each other and glue under the eyes.
Step 9: Glue a pom pom on top of the pipe cleaners.
Step 10: Using a marker draw on a mouth.
14. Paper Plate Footprint Bunny
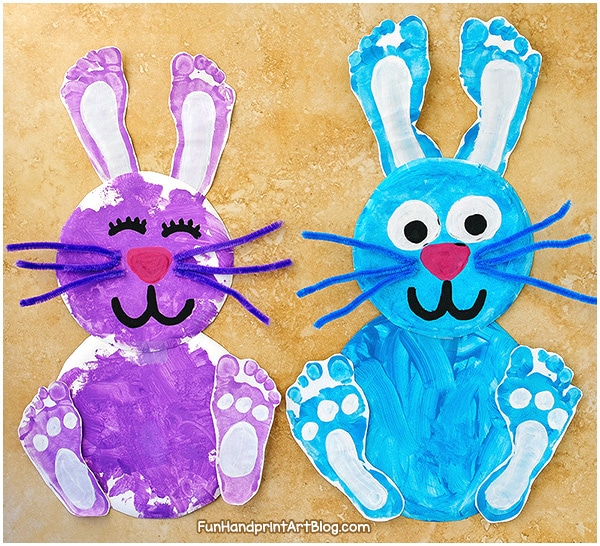
Difficulty: Intermediate
Some adult supervision required.
Use paper plates and footprint stamps to make a bunny that is uniquely yours. Footprint painting can often be a messy task, so make sure when your kids do this one, they are close to water! Footprint painting is another great sensory activity for small children to learn what paint feels like against their skin.
Step 1: Paint one large and one small paper plate (or just use circles cut from cardboard).
Step 2: Paint feet and make two footprints of each foot on white cardboard.
Step 3: Once dried, paint white ovals on each of the feet.
Step 4: Cut out footprints.
Step 5: Glue paper plates together and glue one set of footprints behind the smaller paper plate and the other set in front of the larger paper plate.
Step 6: Glue on pipe cleaners for whiskers and paint an eyes nose and mouth on.
15. Easter Paper Bunny
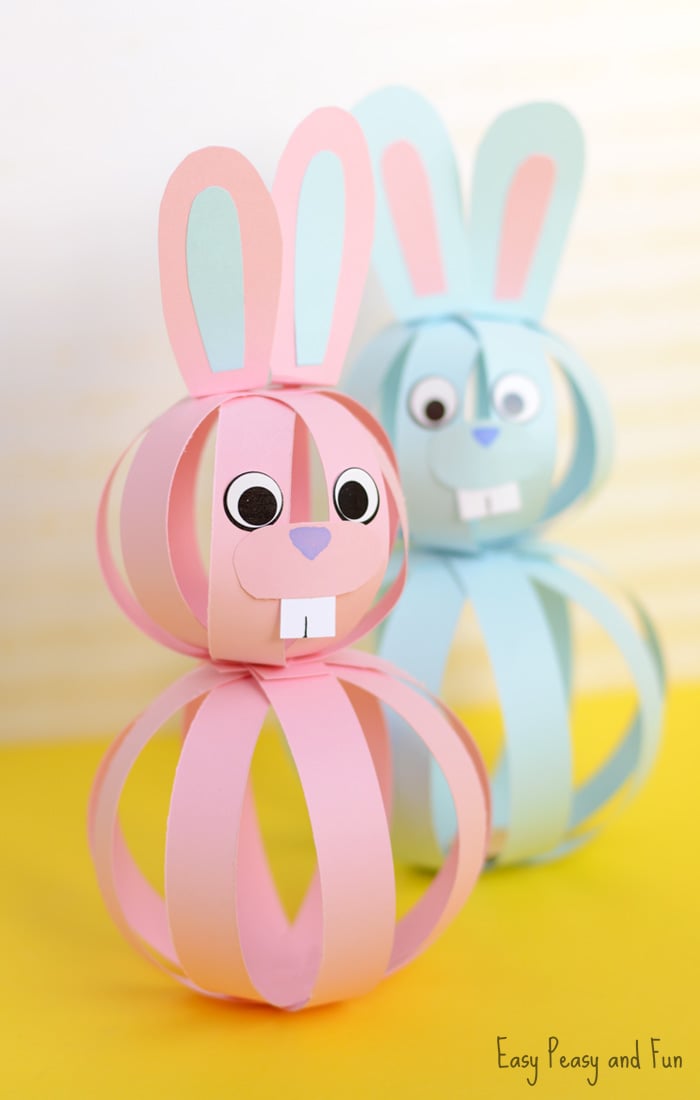
Difficulty: Hard
Some adult supervision required.
This craft can often be a challenge for some children. They will need to engage their problem solving skills to figure out how to arrange and glue the paper strips together to form the two balls that make up the bunny.
Step 1: Cut four 2.5cm wide strips along the long side of an A4 piece paper and four 2.5cm wide strips along the short side of an A4 piece of paper.
Step 2: Take the long strips and assemble them like a snowflake, gluing them in the centre.
Step 3: Repeat step 2 with the shorter strips.
Step 4: Take the snowflake with the longer strips and glue the strips together to form a ball.
Step 5: Repeat step 4 with the shorter strips.
Step 6: Glue the balls together.
Step 7: Cut ears and inner ear inserts out of cardboard.
Step 8: Glue inner ear inserts to the ears. Fold the bottom of the ear back and glue to the top of the smaller ball.
Step 9: Cut out a snout and draw a nose and cut out teeth using whit paper. Glue the teeth to the back of the snout. Glue snout and teeth to the smaller ball.
Step 10: Glue on googly eyes.
16. Chocolate Easter Crackles
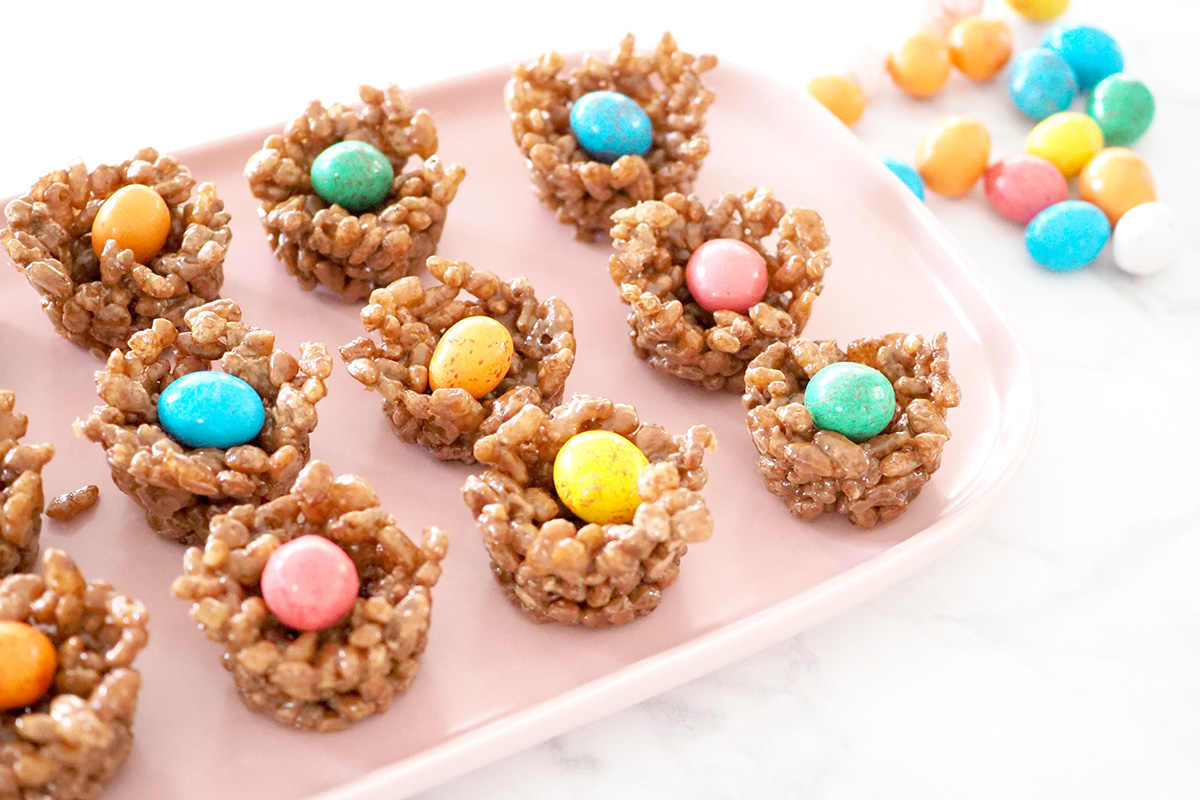
Difficulty: Intermediate
Help from an adult required.
A chocolate treat to make with the kids, it puts a new twist on the classic crackle. This is an easy no bake recipe for anyone to make.
For this recipe all you need is 3 cups of Coco Pops, 60 grams of butter, 160 grams of Mars Bars and small chocolate Easter Eggs. It is also recommended that you use a silicone muffin tray.
This easy activity is also a great lesson for children to learn about portion sizes in food and cooking. Get them to help you measure the ingredients and put the mixture into the muffin trays, ensuring that each hole has the same amount of mixture.
Find the full recipe here.
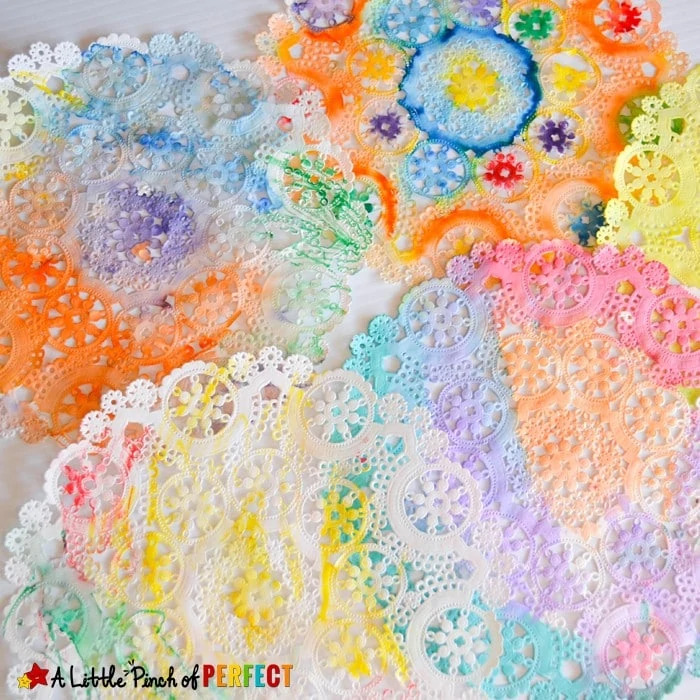
17. Doily Easter Egg Craft
Difficulty: Easy
Some adult supervision required.
Create unique and colourful paper eggs with doily art. Essentially using watercolour art for inspiration, this easy version is less mess and more colour. This is a great opportunity for children to learn about colours and how they mix and combine to create new colours.
Step 1: Cut an egg shape out of coloured cardboard.
Step 2: Colour doily with markers.
Step 3: Carefully use a paintbrush to paint over the doily with water and leave to dry.
Step 4: Glue the doily to the egg shaped cardboard and cut off excess.
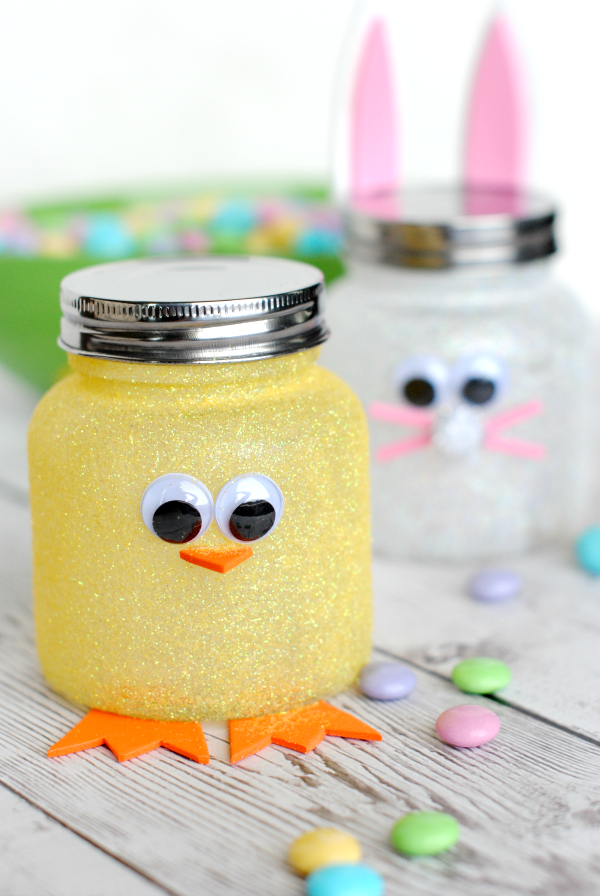
18. Easter Lolly Jars
Difficulty: Intermediate
Some adult supervision required.
Use mason jars to make cute chicks or bunnies. Use them year-round to store lollies, biscuits and other treats. This fun activity adds a little pizazz to any cupboard or pantry.
Step 1: Paint a thin layer of decoupage all over the jar, sprinkle gold glitter on it and shake off the excess.
Step 2: Cut out a beak and feet from orange foam.
Step 3: Glue feet to bottom of jar and beak to the front.
Step 4: Glue googly eyes above the beak.
Tip: Use the jar to play games, such as ‘what’s in the chicken jar’ where you or your child put a small object in the jar and the other asks questions about what the object is.
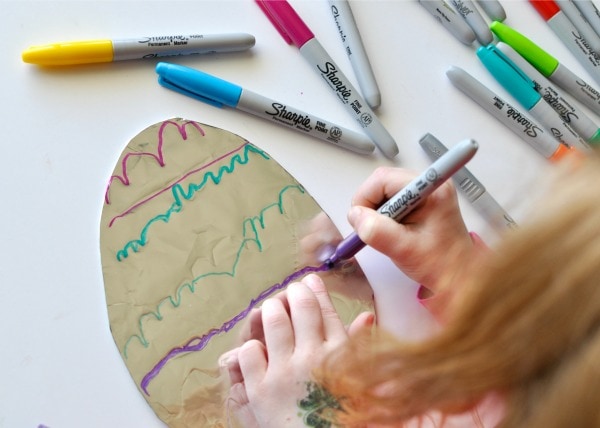
19. Alfoil Easter Eggs
Difficulty: Easy
Some adult supervision required.
Easter egg art using alfoil is a new creative way for children to practice their sensory skills and hand-eye coordination by tracing their own designs. Using a hole puncher and some string or ribbon, this craft can be turned into an ornament to hang around the house.
Step 1: Cut a piece of cardboard into an egg shape and cover with foil so the shiny side is up.
Step 2: Leave the lid on the marker and draw designs.
Step 3: Then trace over the designs with markers.
Tip: Alternatively, you can draw your child’s name on the egg using the lid on the marker and get your child to trace over your handwriting and then add a few designs of their own.
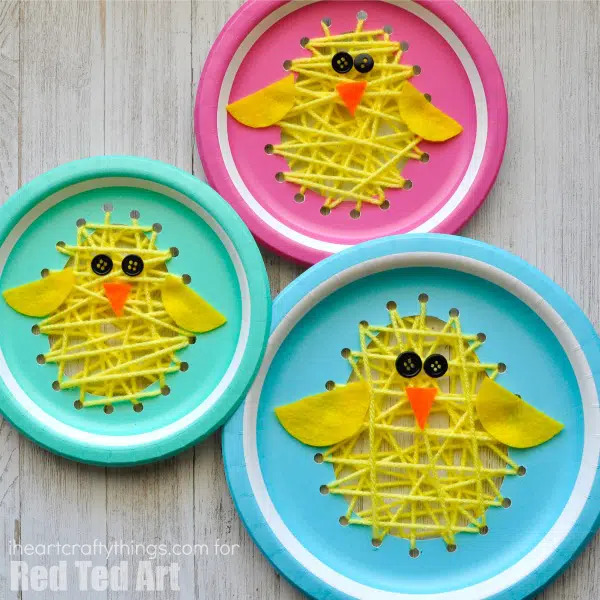
20. Paper Plate Easter Sewing Craft
Difficulty: Intermediate
Help from an adult required.
Make your own chick out of a paper plate and some wool. This inventive activity can help children develop their hand-eye coordination by threading wool through holes. Hand-eye coordination is very important for children to practice at a young age, and this craft provides a perfect opportunity to do so.
Step 1: Cut an egg shaped hole in the middle of the paper plate.
Step 2: Use a hole punch to make smaller holes around the larger hole.
Step 3: Cut approximately 3 meters of yellow wool.
Step 4: Tape one end of the wool to the back of the paper plate.
Step 5: Using either a needle or wrapping tape around the other end of wool, start threading it through the holes.
Step 6: When the wool reaches the end, tape the end to the back of the plate.
Step 7: Cut two wings from yellow felt and a beak from orange felt.
Step 8: Use a hot glue gun to glue the wings and beak on the wool
Step 9: Glue on two black buttons for eyes.
Tip: Make multiple designs out of different shapes for more practice, or get your child to unthread the wool before the beak, eyes and wings are glued on and then re-thread.
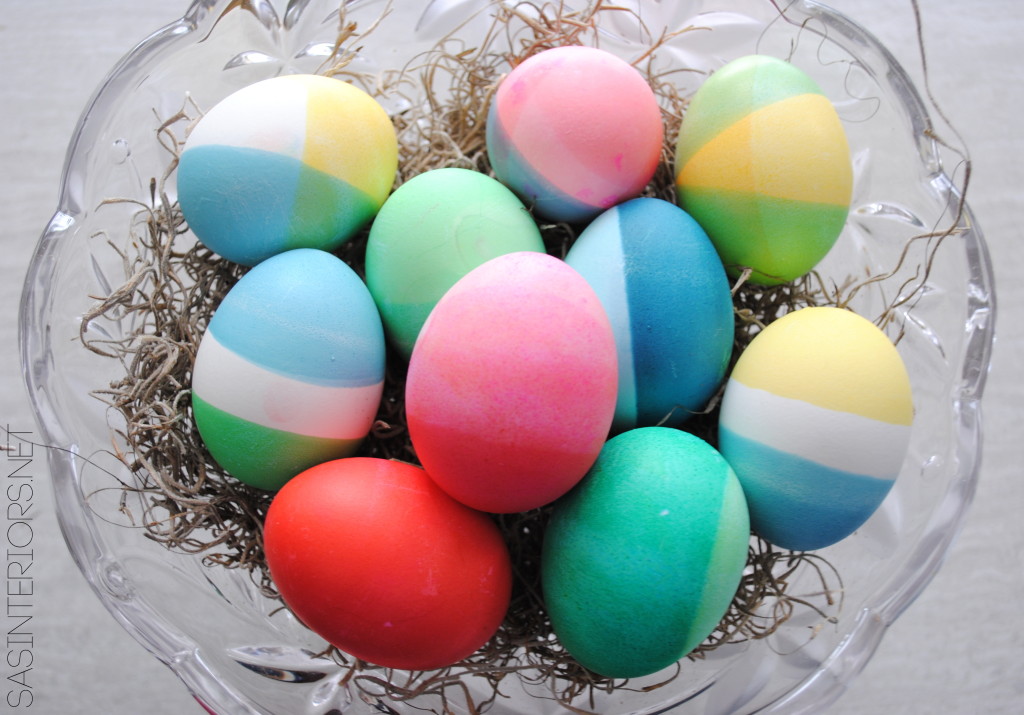
21. Dip Dyed Egg
Difficulty: Hard
Help from an adult required.
Who doesn’t like a bit of colour this Easter? Use food colouring to dye hard boiled eggs colourful patterns. From two-toned eggs to ombre and more, there is so much creativity to be had.
Step 1: Put eggs in a pot and fill with water so there is about 5cm of water over the eggs.
Step 2: Put pot on stove and heat up until water reaches boiling point.
Step 3: Remove pot and cover with lid for 12 minutes.
Step 4: Remove eggs from pot with spoon or tongs and leave to rest for two minutes.
Step 5: Combine ½ cup of water, 1 teaspoon of vinegar and 25 drops of food colouring in a small bowl.
Step 6: Repeat step 5 for each colour you want.
Step 7: Dip eggs in coloured water and pat dry with a paper towel.
Tip: The longer you leave the egg submerged in the colour, the darker it will be.
There are so many fun arts and crafts activities that your children to try this Easter, we promise they won’t get bored! Plus, with any of these activities, there are opportunities for children to use their creativity and imagination to take their arts and crafts to a whole new level.
Whether it is creating Easter ornaments for an Easter tree, or painting a scene for a bunny stamp…let your children take control of their ability to invent, learn and grow!
Easter is a much needed break for many families, and we hope these Easter arts and crafts can be used so families can spend some much needed quality time together and create new and fun memories.


